Step 1
Start by building a frame around the Belfast sink. Place it upside down on the ground and cut two lengths of treated exterior wood (decking spindles) to the same width as the sink to support it underneath the front and back. Then cut four legs, one for each corner, to reach from the ground to the top of the sink.
Step 2
Use mitre adhesive to temporarily secure the legs and supports together, before drilling pilot holes and using outdoor screws to attach them. If you find that you can’t attach the side extensions (step 4) with screws because of existing screws in the frame, use the zinc-plated brackets to join them instead.
Step 3
Cut horizontal supports from the treated wood to join the front and back legs at the top and bottom, and ensure the frame is sturdy enough to hold the sink. Add similar supports to link the front and back of the sink base.
Step 4
Extend the kitchen unit by creating two more sets of legs (to the same dimensions) that will sit on either side of the sink frame. Join these to the sink frame with horizontal lengths (you may have to use the brackets for this). Add brackets underneath the sink supports too, as this is the heaviest part. Paint the frame now, as it will be tricky once the slats are attached.
Step 5
If you’re using a fence panel, you’ll need to carefully remove the slats using a crowbar. Hammer out any nails and cut the fence panels to size – you’ll need 900mm slats for either side of the sink, and shorter slats for the section under it (don’t worry if they’re a bit too long). Give the slats a coat of exterior paint now before you attach them.
Step 6
Work out the spacing between the slats however you want, but try to ensure a regular gap. Make sure all the slats are aligned to the top of the frame, then attach them to the frame with an instant grab exterior adhesive (choose one that takes 10-15 minutes to dry, so you can adjust them if necessary). You can leave a gap in the slats to access a small shelf, which you can make by attaching a couple of leftover slats across the horizontal supports inside. Once the adhesive is dry, nail the slats in to secure them and then paint them.
Step 7
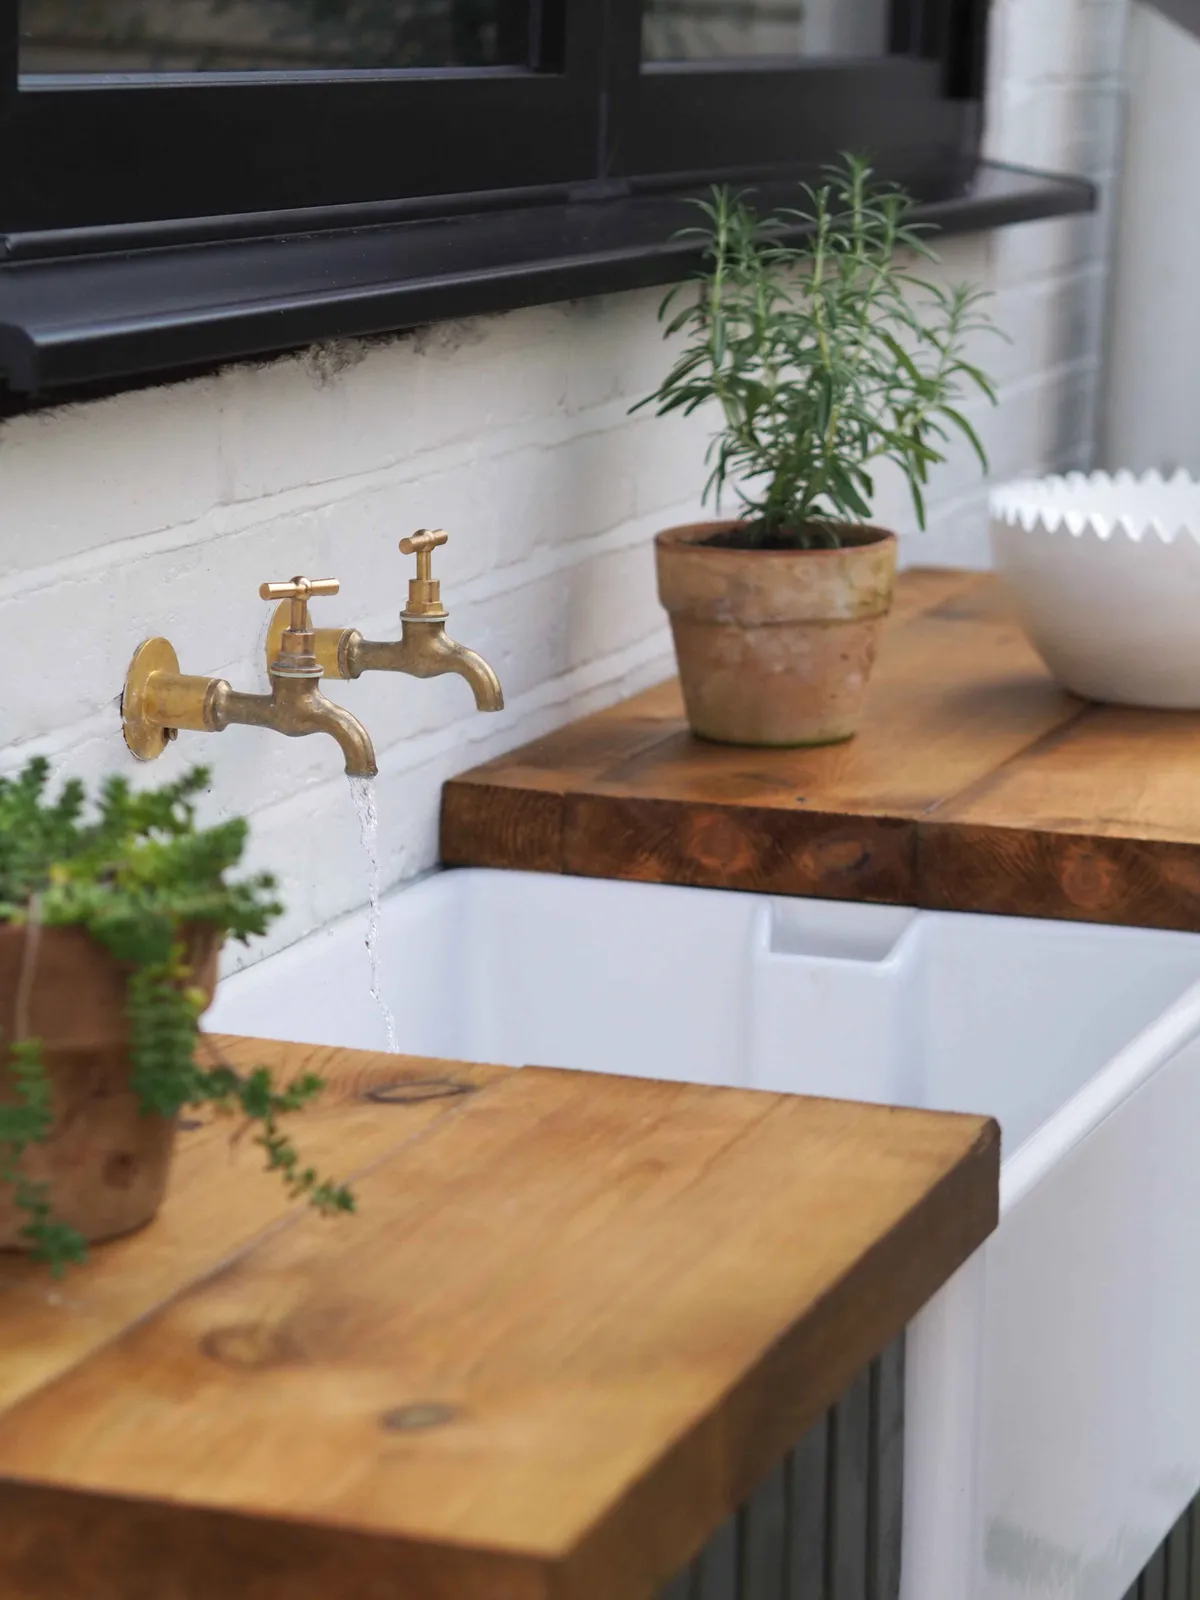
If necessary, cut along the bottom of the slats using a multi-tool to neaten up the edges. Add small plastic feet to raise the frame off the ground and keep it out of standing water. Insert the sink and fix the frame to the wall – use large brackets and long masonry screws to make it as secure as possible.
Step 8
To make the worktop, cut two pieces of thick treated exterior wood to fit either side of the sink with a little overlap. Sand the edges smooth, then treat them with an exterior woodstain. Secure them to the frame with the instant grab exterior adhesive. You could also attach some small zinc-plated brackets underneath for extra security.
Step 9
Give the slats a second coat of exterior paint to fully protect the unit from the elements. Finally, plumb in the sink waste and your outdoor kitchen is ready!