All products were chosen independently by our editorial team. This review contains affiliate links and we may receive a commission for purchases made. Please read our affiliates FAQ page to find out more.

How to colourwash a wall

Colourwashing gives walls a textured, antique finish. In this tutorial, we'll share a simple colourwash technique

Published: August 20, 2021 at 9:00 am

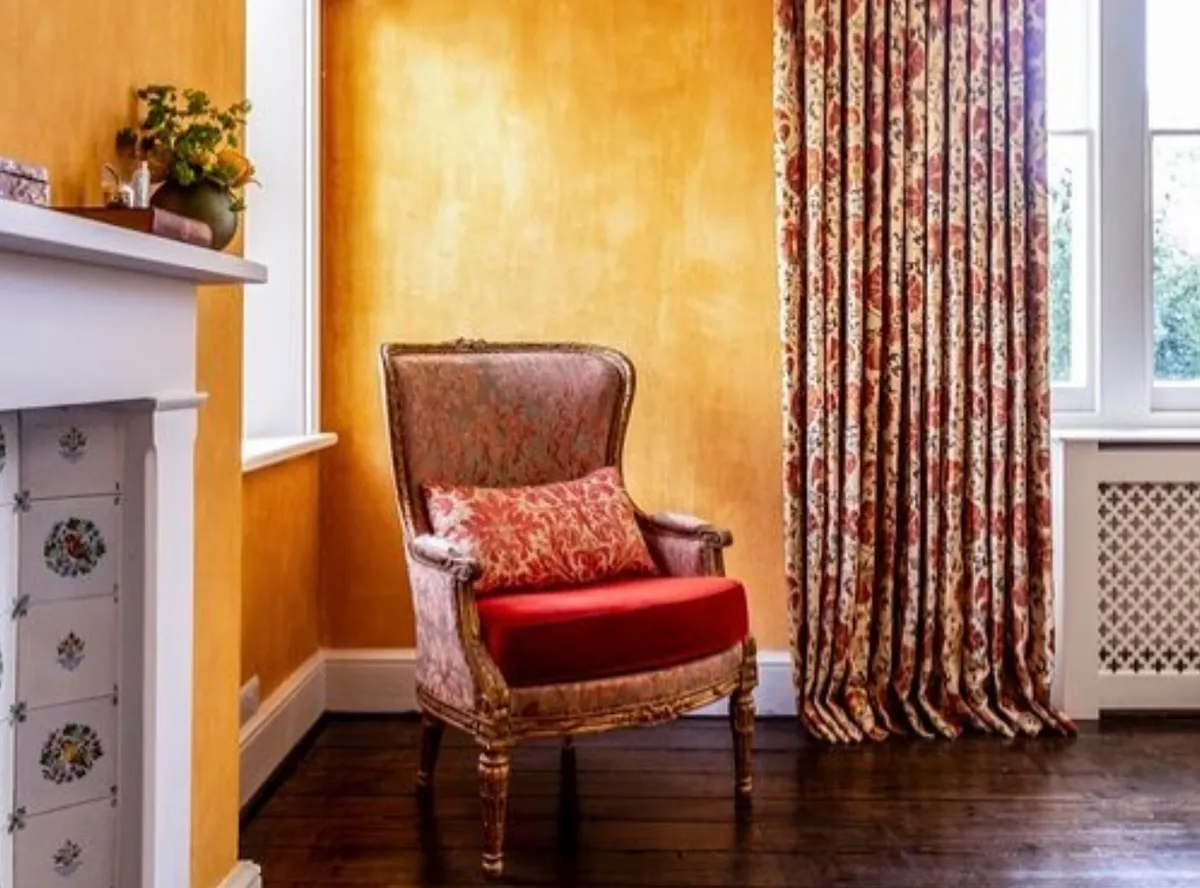
Colourwash wall
Image courtesy of Will Foster Studios

If you've been browsing Instagram lately, you'll probably have noticed some beautiful colourwash walls. Whether its that Tuscan-style mottled terracotta or velvety clouds of grey or blue, that dreamy translucent effect is everywhere on social media right now.

View this post on Instagram

A post shared by Julie Jeongeun (@letsby.avenue)


undefined

Luckily, colourwashing is a very simple technique, and can be used either throughout a room or as a stylish feature wall.

So if you're tired of simple block colour walls and want to give colourwashing a try, read on for our tutorial!

What is colourwashing?

Colourwashing, sometimes called faux glaze painting, is a technique in which a thin layer of diluted paint is applied over a base colour, giving a weathered finish reminiscent of a rustic farmhouse or cottage.

Colourwashing is a modern variation on whitewashing, an ancient decorating technique in which diluted quicklime or chalk was applied to interior and exterior walls to keep them looking fresh, with natural pigments sometimes used to add colour to the wash. This technique was common around the world for centuries, before paint became an affordable mass market product, and can still be seen in some cottages and farmhouses today.

The surging popularity of traditional, nature-inspired decor and the rise of cottagecore has led to a renewed interested in the rustic, hand-applied finish of colourwashing.

If you're interested in colourwashing your walls, the good news that this method doesn't require expertise or a lot of tools, making it very much suitable for a DIY amateur. Nor will it cost you the earth - the only thing you will need to be rich in is time - a full colourwash requires several coats, so you'll just some need patience and a fit arm.

How to colourwash walls

You will need:

  • Two tins of paint: one colour for your base and a lighter or darker shade for your colourwash. Any standard wall paint will do, but a glossier finish like satin has a slower dry-time and so will give you more time to work.
  • A clear water-based glaze like Polyvine Classic Colour Scumble
  • A bucket
  • A roller or paintbrush to apply your base layer
  • A soft paintbrush or sponge to apply the colour wash

Note: if you're a confident painter, it is possible to use water rather than glaze to dilute your colourwash. The technique is the same, but you will have to work faster when applying the wash, as a water-diluted solution will dry faster.

Total time

NaN hrs NaN mins

depending on paint dry-times

Step 1

Start by preparing your walls the same way you would before any paint job – fill in holes or cracks, wash with a sugar soap solution and allow to dry. Check out our tutorial on preparing walls for paint to get a step-by-step guide.

Cover your floor and furniture in dust sheets, and use masking tape to cover power sockets, switches and any other area you want to keep paint-free.

Step 2

Apply your base layer as normal, with a brush or roller. Leave to dry and apply a second coat, if needed.

Step 3

Time to create your colourwash! In a bucket, pour out some of the paint you have chosen for your colourwash and start mixing in glaze, using a ratio of roughly four parts glaze to one part paint.


Step 4

After ensuring the base coat is fully dry, start applying your colourwash! You can use either a paintbrush or a sponge, depending on the desired effect. A paintbrush will give a more textured finish, while a sponge will have a softer effect.

Apply a little paint at time and then quickly spread it out with your brush or sponge. Some people prefer to create a rough criss-cross pattern, others prefer soft swirls or random strokes – use what feels natural and stay consistent with whatever technique you choose.

Step 5

Leave to dry thoroughly. If desired, you can apply a second layer of colourwash.

The above is one way to add a colourwash to your walls, but the colourwashing is such a simple technique that it’s easy to create different effects by switching up your painting style or going a little darker or lighter on your glaze coat. You could even add two glaze layers in different shades!

You can actually skip diluting altogether if you’re feeling creative. One technique gets the colourwashing look by painting two complementary colours – think off-white and dusky pink – onto the wall at the same time, as demonstrated in this video tutorial by CuttingEdgeStencils.


This website is owned and published by Our Media Ltd. www.ourmedia.co.uk
© Our Media 2024