
Make your own light-up reindeer Christmas decoration
With a few tools and some MDF you can make this light-up reindeer Christmas decoration in a weekend.
If you don’t have any MDF, the sheets are cheap to buy from DIY stores. The fiddliest part is cutting out the antlers so you might like to practise using the jigsaw first if you’re new to this tool, then take your time and you’ll soon get the hang of it - check out our buyer's guide for tips on finding the right jigsaw for you.
- Gorgeous autumn wreaths to welcome the season in style
- 6 best trees to grow in pots for any sized garden
- The best multi-fuel stoves to burn logs, wood pellets and smokeless coal in 2025
How to make a light-up reindeer Christmas decoration
You will need
- leftover sheet of MDF or plywood, measuring at least 120 x 120cm
- large sheets of paper
- pencil
- scissors or craft knife
- jigsaw
- sanding block
- masking tape
- drill and drill bit
- exterior wood paint - we used Royal Exterior Wood Finish in Snow from Protek
- paintbrush
- LED rope lights - try 10m LED outdoor rope lights
- cable ties - try a pack of 100 200 x 4.5mm natural cable ties
1. To make the template, tape together several large sheets of paper and draw out your reindeer figure by downloading the outline we used here and scaling it up, or drawing your own.
You can adjust the size if you want to make a smaller version, but for a full-size version, the body shape should measure 94cm from the tip of the antlers to the base of the body and 92cm wide from the tip of the nose to the tail. The legs should measure 33cm wide by 60cm high.
Draw a vertical slot measuring 1cm wide by 10cm deep in the centre top of the leg piece. Draw two slots measuring 1cm wide by 10cm deep on the bottom of the body, spaced 39cm apart, and set at slightly inward-facing angles. Cut out the templates using scissors or a craft knife.

2. Use the templates to draw one body piece and two leg pieces on to a sheet of MDF or plywood.
Use a jigsaw to cut the body piece and leg pieces out of the MDF. Smooth the edges using a sanding block and a fine grade sandpaper to remove any roughness or splinters.

3. Slot the leg pieces into the body. Starting just behind the hind legs, tape the lights around the outside edge of the reindeer. This will make sure you have enough lights to reach all around the body and legs, and help you map where you need to drill the holes for the cable ties to attach the lights to the body permanently. Use a pencil to mark drill holes at regular intervals around the body.
Remove the lights and masking tape. Dismantle the legs and, working on a flat surface or workbench, drill holes around the legs and body following your pencil marks. Place a piece of scrap wood under the area you are drilling to prevent the underside of the MDF from splitting. Once you have finished, use a sanding block to smooth both sides of the drilled holes.

4. Slot the body and leg pieces together once more. Using a paintbrush, apply three coats of exterior paint to the reindeer to protect it from the elements, allowing the paint to dry thoroughly between coats.
We used white paint but you can use any colour and add as much detail as you like.

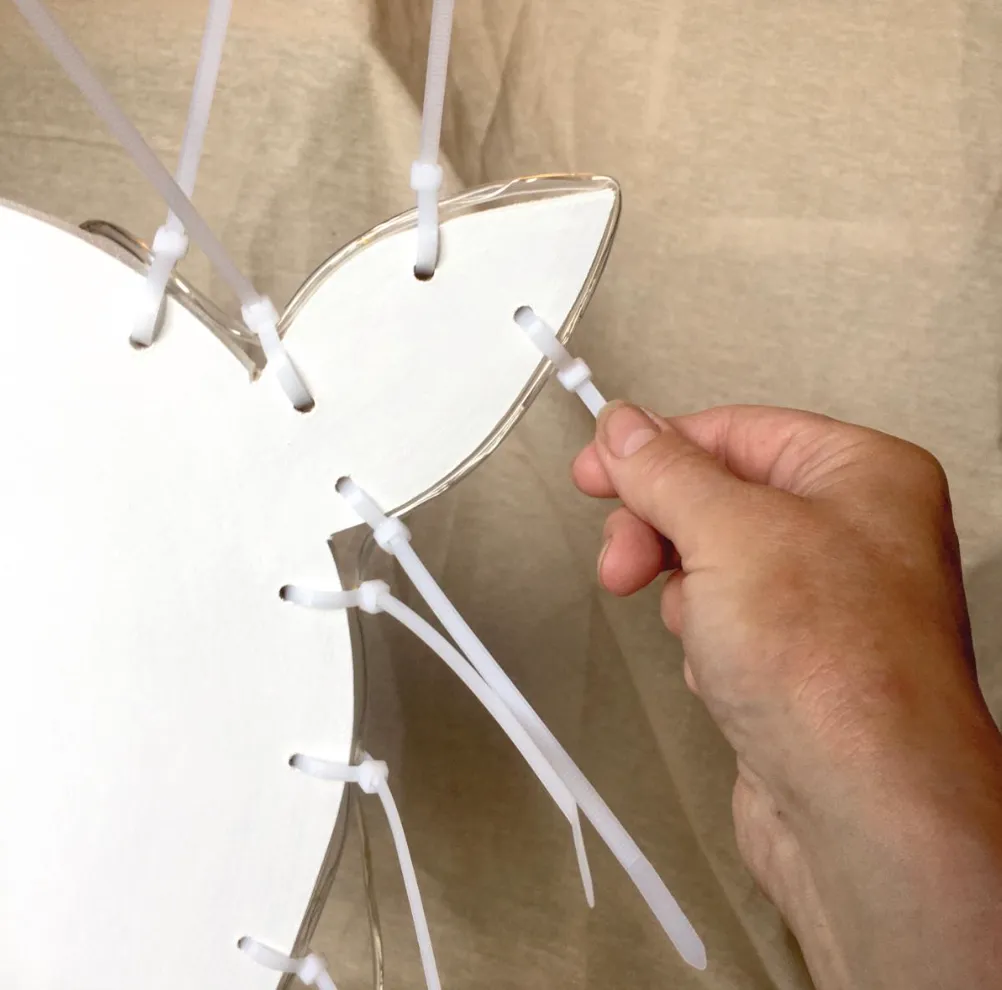
5. Thread cable ties through all of the drilled holes, working in the same direction to keep the overall effect neat.
Once again, starting just behind the hind legs, attach the rope lights around the outside edge of the reindeer, loosely pulling the cable ties as you work around the reindeer.
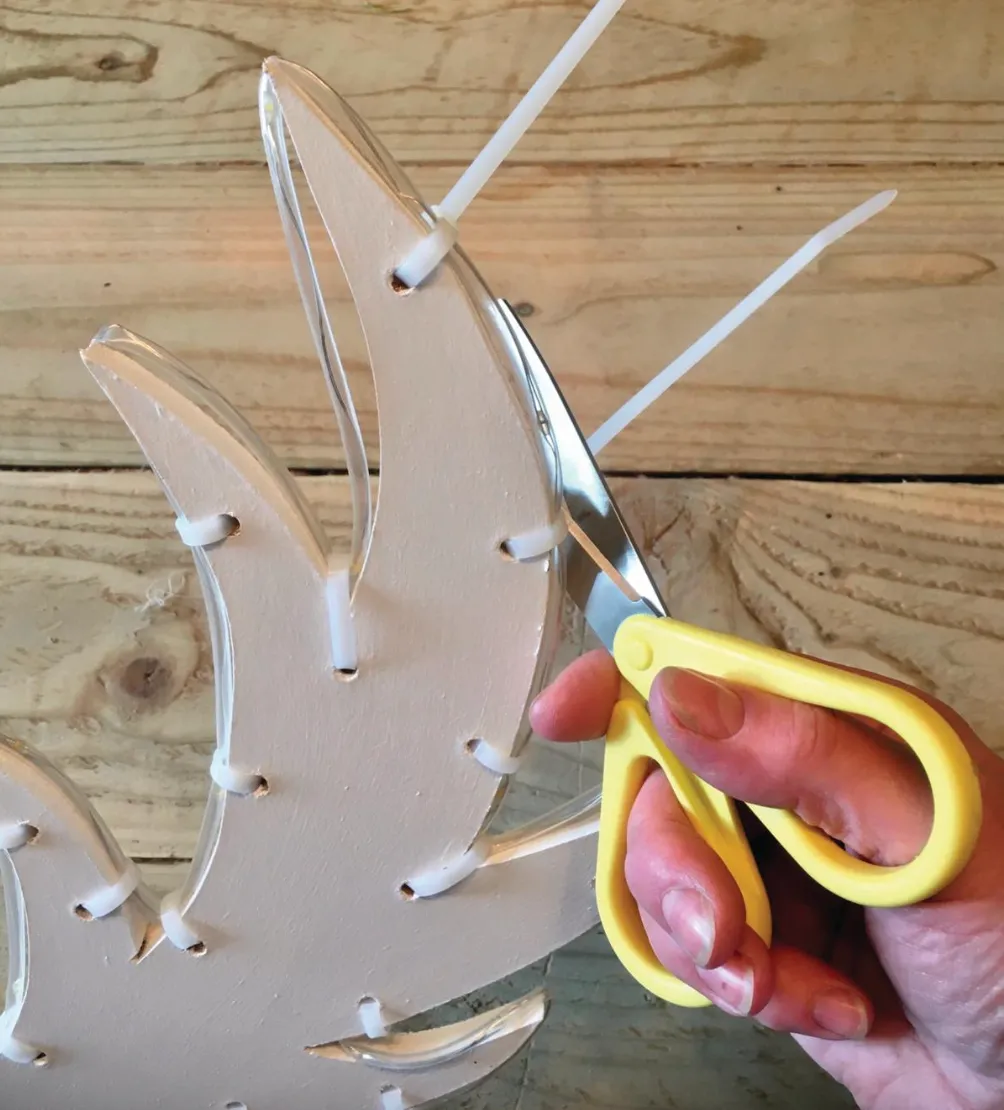
6. Once you’ve finished loosely tying in the rope lights, carefully work your way back around the reindeer tightening them all up, making sure the cable tie fastenings are twisted towards the back of the reindeer. Use a pair of sharp scissors to cut away the ends of the cable ties.
Finally, attach the battery pack for the rope lights to the back of the reindeer using another cable tie. Your reindeer is ready to shine!
Ready to try your hand at more home-made decorations? Explore all our Christmas crafts here!


